
A comprehensive step-by-step guide for professional fabricators
Beyond aesthetics, there are functional benefits to having a solid surface undermount sink, versus a top mounted (or drop-in sink). Undermount sinks are easier to clean and keep hygienic since the barrier around the sink, like the lip for a top mounted sink, is no longer there. Additionally, the seam between the sink and the top is bacteria, stain and water resistant because it is a hardened resin like the rest of the non-porous sink and countertop.
The first step to installing a solid surface undermount sink is to turn the solid surface sheet upside down and locate the place where the sink is to be placed. Then, position the bowl on the surface and use hot melt glue to fasten positioning blocks around the sink to aid in alignment during gluing. Drill a 1-1/4" hole in the top, in-line with the sinkhole, so that you can insert an all-thread rod. The rod, along with nuts and wood blocks (that act like large washers), are used to place a moderate and even amount of pressure on the sink for gluing.
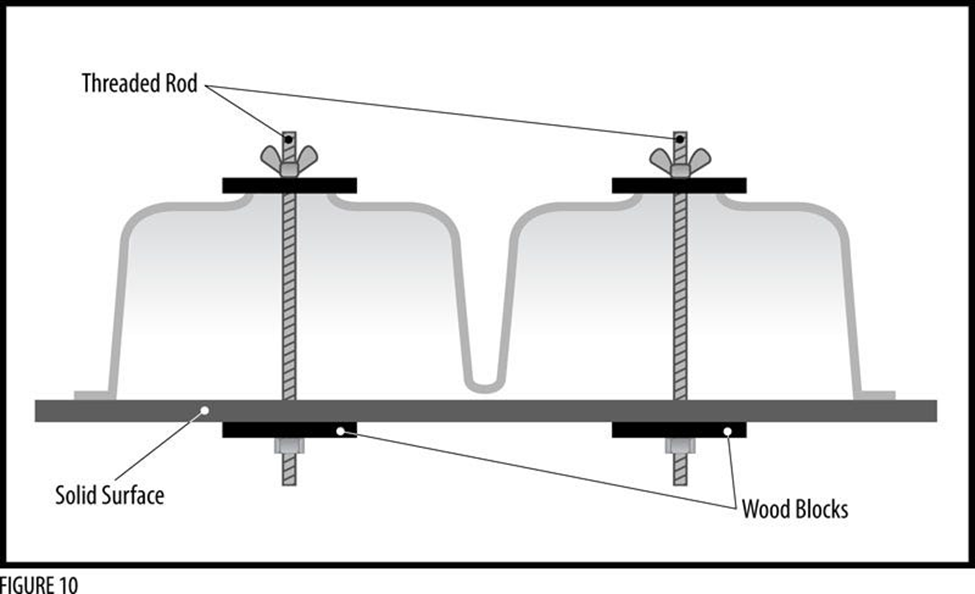
Carefully remove the sink from its marked location. Scuff the undersurface of the top where the sink will sit and the top flange of the sink bowl with 80-grit sandpaper. Clean both surfaces with denatured alcohol. Use a flat sanding block to ensure you don't round-over the inside edge of the sink when sanding.
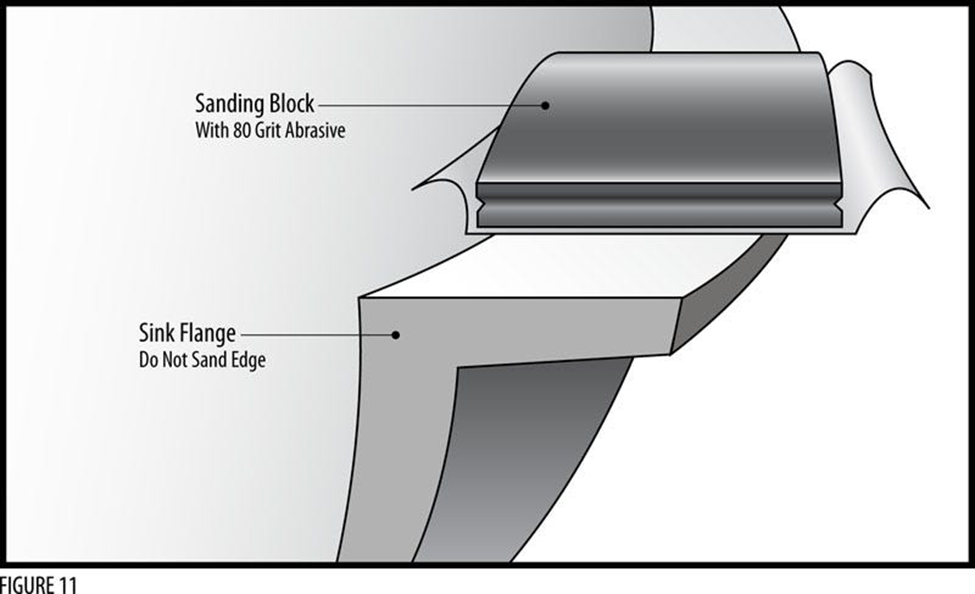
The goal, when gluing a sink in place, is to have the glue line appear perfectly flat. In almost all instances the countertop is true (flat). In these cases, where the rim of the sink is perfectly true, then the glue line will be flat and you can use the adhesive color recommended by the manufacturer for the countertop or the sink.
If the rim of the sink is not perfectly true (flat), then use the adhesive color that is recommended by the manufacturer for the sink. That way, the uneven sink rim will not show, since the adhesive which matches the sink will effectively "disappear" from view. In essence, the adhesive will create a self-leveling effect.
Next, apply two beads of adhesive to the sink rim; one near the inside edge, making sure there will be squeeze-out all the way around, and the other near the outside edge. Carefully position the sink inside the area of the positioning blocks.
Place the all-thread rod in place with wood blocks and tighten it until you see adhesive squeezing out all around. Even though you won't be able to see it, you will want to apply enough adhesive so it squeezes in around the inside as well. Do not over tighten as this will "starve" and weaken the seam. Allow the squeeze-out to harden for about 30 minutes or until it is hard to the touch.
Turn the countertop over so the top is facing up. Two different router bits will be used to remove the material from within the bowl opening and provide the edge to the sink. The first is a ½" 2 Straight-Flute bit with a large nylon bearing at the bottom. The bearing has a larger diameter than the bit which will position the cutting edge of the bit back from the inside wall of the sink. This bit will cut away the top and will leave a lip around the inside edge of the sink that will be removed by the second bit.
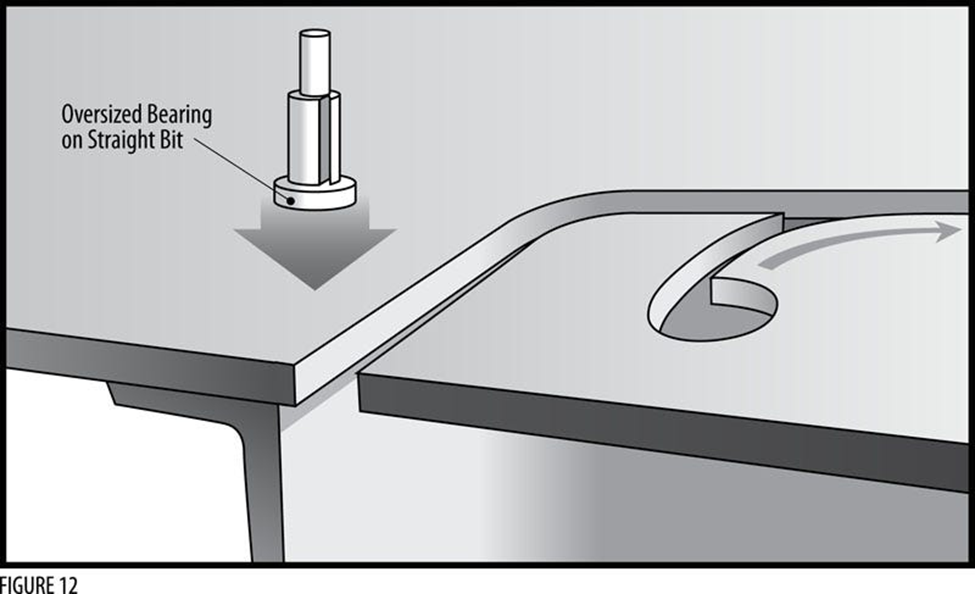
Next, use a Roundover bit with a nylon bottom bearing. This bit will cut a small amount from the edge of countertop and the sink, including the protruding squeeze-out. Position the bit, up and down, so the bearing rides below the seam squeeze-out and the top of the cutting edge clears the countertop surface.
Make sure the bevel angle of the Roundover bit is suitable for the bevel angle of the sink. The angle of the sink wall may change as you move around the sink. There may be a slight ridge left in some places after routing. This is expected and can be sanded away with a random orbit sander and 180-grit sandpaper, followed by 280-grit sandpaper.
Finally, finish sanding the rounded surface with a random orbit sander and a soft thick backing pad. The pad allows the sandpaper surface to flex and easily follow the rounded edge.
Our team of experts is here to help you with any installation queries
Contact Our Experts